Jira
Connect Jira to link issues to your commits. When you commit, you can attach a Jira issue; when you push, Anchorpoint posts a back-link comment to that issue and shows the linked issue on the timeline. This keeps your code history and your Jira board in sync without leaving Anchorpoint. Note that the integration works with Jira Cloud.
How it works
| Step | Where | Who |
|---|---|---|
| Connect your Atlassian account | Account Settings → Integrations | Each member (per user) |
| Link the project to a Jira project | Project settings → Jira | Project Owner / Admin |
| Pick an issue for a commit | Git channel, changed files area | Anyone who commits |
| Push → comment on the issue | Automatic | The member who pushes |
Connecting is per user — every team member who wants to link issues connects their own Atlassian account. Linking a project to a Jira project is done once by an admin and applies to the whole team.
1. Connect your Jira account
- Open Account Settings → Integrations and find Jira.
- Click Connect. Anchorpoint opens your browser so you can sign in to Atlassian and grant access.
- If your Atlassian account has access to more than one Jira site, choose the site you want to use, then click Activate.
Once connected, the integration shows Disconnect and Visit actions. Use Reconnect if your session ever expires.

2. Link a project to a Jira project
Linking tells Anchorpoint which Jira project this Anchorpoint project belongs to. Only a project Owner or Admin can do this, and the link is shared with the whole team.
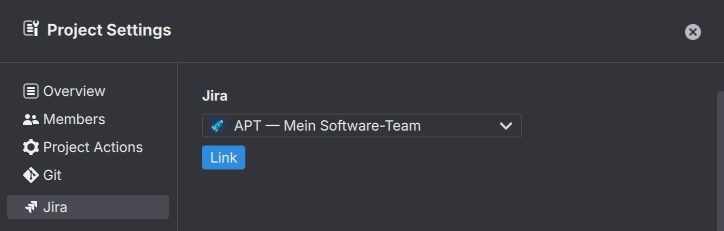
- Open the project's Project settings (the project must be a Git project).
- Open the Jira tab.
- Pick a Jira project from the dropdown (type to filter) and click Link.
- The tab now shows the linked project, an Unlink button, and a switch to comment on the linked Jira issue when a commit is pushed (on by default).
If the project is already linked to a different issue tracker, the Jira tab shows an info note instead of the dropdown so the existing link is not overwritten. Unlink the other tracker first.
3. Link an issue to a commit
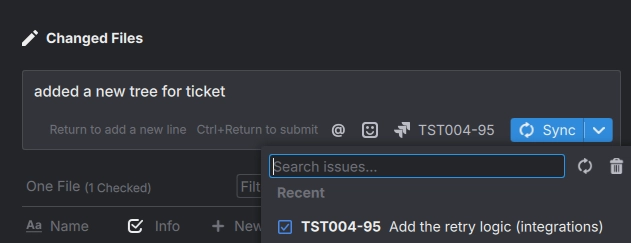
Once the project is linked and you are connected, an issue picker appears in the Git channel next to your changed files.
- In the changed-files / commit area, open the issue picker.
- Choose an issue. The picker shows recently updated issues and issues assigned to you in the linked project, and you can search by text.
- The selected issue stays attached to your next commit. Commit as usual.
Anchorpoint adds a hidden AP-Id reference to the commit so the link survives push and pull. The
selection is cleared after the commit, so pick a new issue for the next one (or leave it empty for a
commit with no linked issue).
4. Push and the Jira comment
When you push, Anchorpoint posts a comment to each linked issue containing the commit message and a "Committed in Anchorpoint" back-link. Clicking the short commit hash in the comment opens that commit in the Anchorpoint timeline.
- Each issue is commented once per commit — re-pushing does not create duplicate comments.
- Comments are posted in order, oldest commit first.
- Turn comments off per project with the switch in the Jira tab in the project settings (step 2).
Timeline
Commits that are linked to a Jira issue show a small issue pill on their timeline entry. Click the pill to open the issue in your browser. Team members see the pill on each other's commits after they pull.

Notes and limitations
- Jira Cloud only — Server / Data Center are not supported.
- Connecting is per user. Linking a project (admin) does not connect other members' accounts; each member connects their own.
- One Jira project per Anchorpoint project. Re-link to change it.
- The issue picker only shows issues from the linked Jira project.
- If you are not connected when you push, no comment is posted for your commits, but the commit and its timeline pill are unaffected.
Disconnect and unlink
- Disconnect your account in Account Settings → Integrations → Jira. This only affects you.
- Unlink the Jira project in Project settings → Jira (Owner / Admin). This affects the whole team and stops new issue links and comments.