Attributes
Set tags, statuses, assign team members or add notes using Attributes. They are an additional interface element on your file or folder. Attributes are stored in views. Think like adding a column in an Excel spreadsheet.
Creating Attributes
Where can I use Attributes
You can create Attributes on any file, folder or task.
How are Attributes stored
Attributes are stored in our cloud. Every Attribute you create is global. This means that it can be reused anywhere in a project. For example, if you have a "Status" Attribute, you can use it in your asset or shot folder and don't have to create it twice.
Access control
Only Workspace Admins and Project Admins can add or delete attributes and tags. You can give members Project Admin rights in the "Project Settings" / "Members" by clicking on the small shield icon.
Members without admin rights can rename attributes as long as the attribute's settings are not locked. They can also assign existing attributes to files, folders, and tasks.
Filtering
Attributes can be filtered. You can either use the Quick Find function (CTRL-F) to quickly search for names, tags or descriptions. If you want to build a more advanced filter, you can click on the Filter button, which will show you all available Attributes. Attributes do not have to be visible to be filtered.
Filtering file types globally
If you want to filter out certain file types (e.g. blend1, meta, tmp) that are created by applications but clutter your browser, you can do so in the application settings. Go to "Workspace Settings" / "Application" and scroll down to "Hidden Files". Add the file types you want to hide.
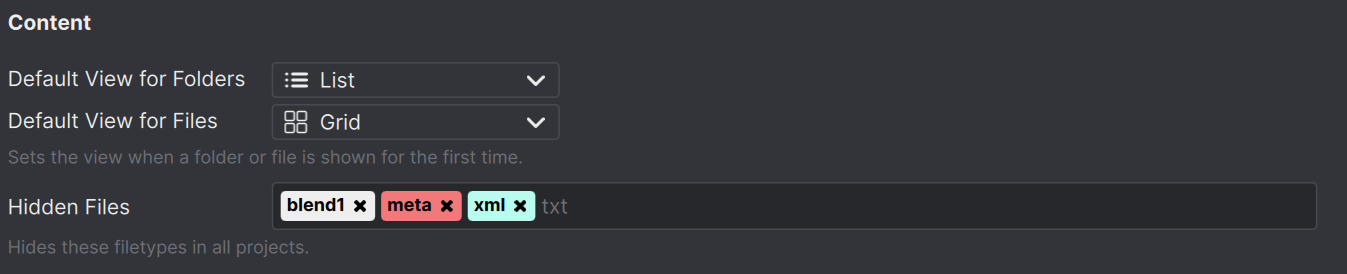 These file types are hidden from the browser and search results for all projects.
Share your view with your team
In Anchorpoint you can specify that everyone has the same view of a folder. If you change the view (e.g. from list to grid) or create a filter, you can pass these settings to your team via Save your view for everyone.
Export as CSV
You can also export your attributes on files, folders and tasks as CSV for other tools like Notion, Excel or Airtable. Click on the "..." button in the top right corner of the view settings and select "Export as CSV".
Anchorpoint exports all visible entries with all visible attributes and creates the CSV file in the same folder.
Locking Attributes and Databases
Anchorpoint allows you to lock metadata to prevent accidental changes by other users. There are three types of locks, all accessible via the context menu of an attribute.
1. Lock Attribute Values
You can lock the values of an individual attribute to make them read-only for all users.
- Users cannot change the attribute's value on any file, folder, or task.
- Hovering over a locked attribute shows a tooltip with the name of the user who applied the lock.
2. Lock Attribute Settings
You can lock the settings of an attribute to prevent structural changes to it.
- The rename and delete options are hidden for locked attributes.
- For single and multiple choice tag attributes, adding, renaming, or deleting tags is prevented.
- For rating attributes, the option to change the star count is hidden.
- Hovering over a locked attribute shows a tooltip with the name of the user who applied the lock.
3. Database Lock
A database lock restricts interaction with the entire metadata table.
- Users cannot sort, rearrange, filter, or create new items (e.g., tasks).
- Attribute values can still be edited unless the attributes themselves are also locked.
- To fully restrict editing, combine the Database lock with the value and settings locks on individual attributes.
Combining Locks
You can apply both a value lock and a settings lock to the same attribute at the same time. Hovering over the attribute shows a combined tooltip indicating both locks are active.
Unlocking
Locks can be removed by the user who created them or by any project or workspace admin.
Note: Locks are interface-level protections. They do not block the Python API from editing Attributes.
Logging
Attribute changes are automatically logged and displayed in the sidebar. These logs help you track who made specific modifications — for example, identifying that the art lead marked an asset as “approved.” The log also records when team members unlock files that were previously locked by someone else. This can be necessary in cases where a user has locked files but forgotten to push or unlock them, such as when leaving the company or going on vacation.
Folders show all Attribute changes that happened on files, subfolders and tasks inside them. You can navigate to the proper file by clicking on the name in the log.
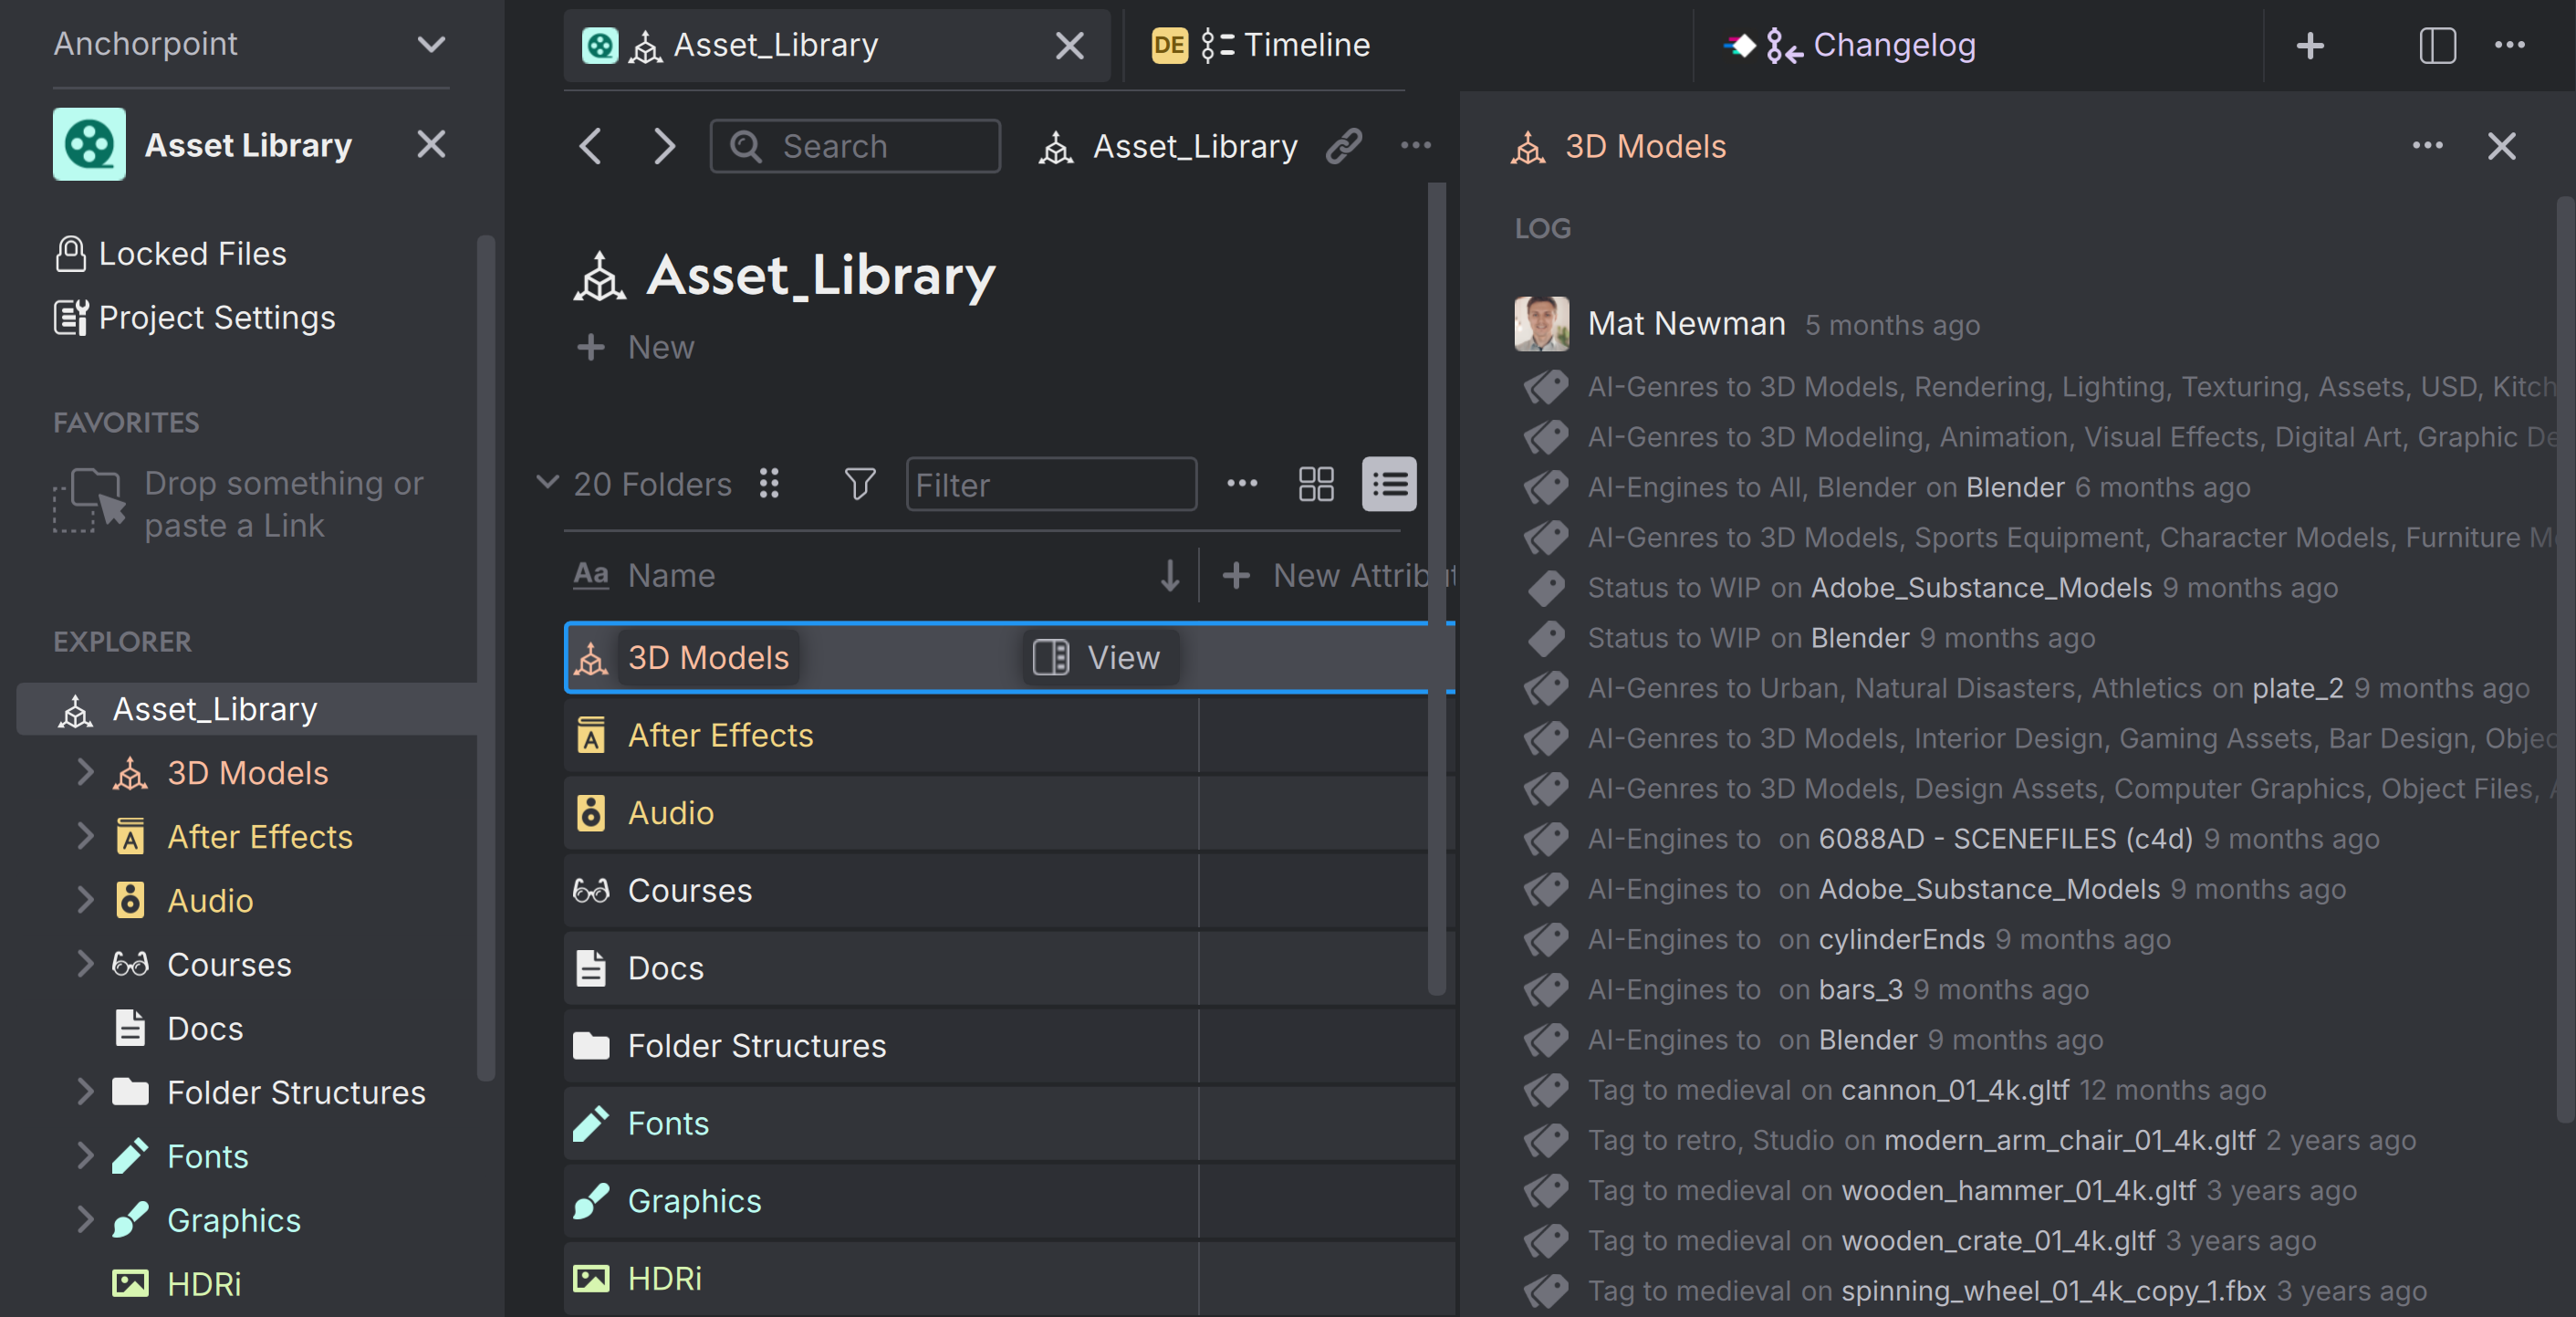 You can open the sidebar by clicking on the "View" button and see all the Attribute logs that have happened inside a particular folder.
Attribute settings
Attribute display settings can be customized under "Workspace Settings" / "Attributes". These settings are saved locally and individually for each member.
Date Format
Changes the date display. In Europe, dates are displayed differently than in the US. You can see an example in the description when you change the date format.
Location
The location Attribute shows up in the search and changed files and displays a folder path. Especially in the changed files, it makes sense to shorten the display of the location, which will lead to a nicer grouping of your files. You can type the folder name, that will be hidden or use a regular expression.
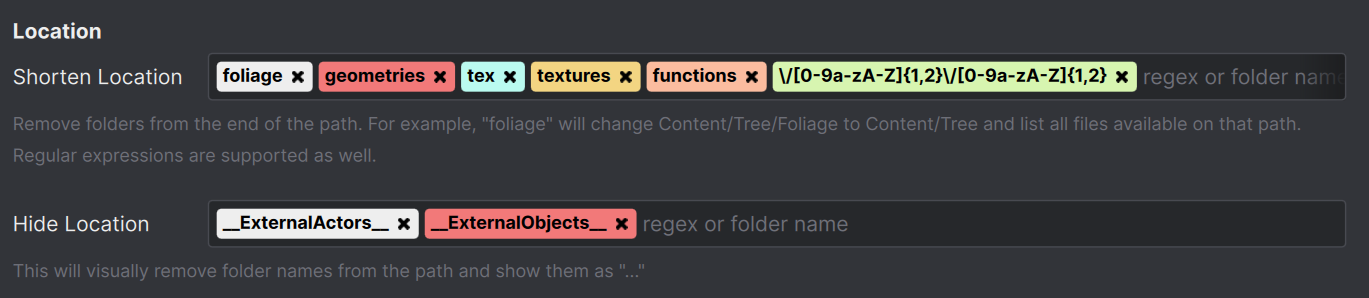 You can hide folders from the location or truncate them from the end of the folder path.
Examples
 One File Per Actor Folders at the end are hidden
Regular Expressions
In addition to typing the folder name, you can use regular expressions to hide specific elements of a file path that match a pattern. The best way to use regular expressions is to ask Chat GPT to write them for you.
Here are some examples for regular expressions:
\/[0-9a-zA-Z]{1,2}\/[0-9a-zA-Z]{1,2} Hides subfolders for One File Per Actor files in Unreal Engine such as: 6/MV or 23/MI.
\/tex(?:tures)? Hides names such as "tex" and "textures"
^_\w+ Hides all folders that start with an underscore e.g. "old" or "_archive"